
Local Accounts
Common User Related Tasks
To manage users, you must be an Administrator or GlobalAdmin. To access the User Management page, do the following:
- Click "Setup"
- Click the "Identity & Access Management" tab on the left side of the screen
- Click the "Manage" button underneath Users
You should now see the options for managing users as shown in the screenshot below:

The basic operations are shown by the numbers in the figure above:
- Add New User - create a new RegScale user
- Search - search for a given user or set of users
- Filters - toggle between active and inactive users (NOTE: Active users are the default)
- Activation - activate or de-activate a given user account
- Edit User - edit user metadata, view their activity, and view emails sent to the user
- Reset Password - generates a one-time token that allows a user to reset their password.
These abilities in aggregate provide a useful set of mechanisms for managing user accounts within RegScale. The overall flow of user management is shown below:
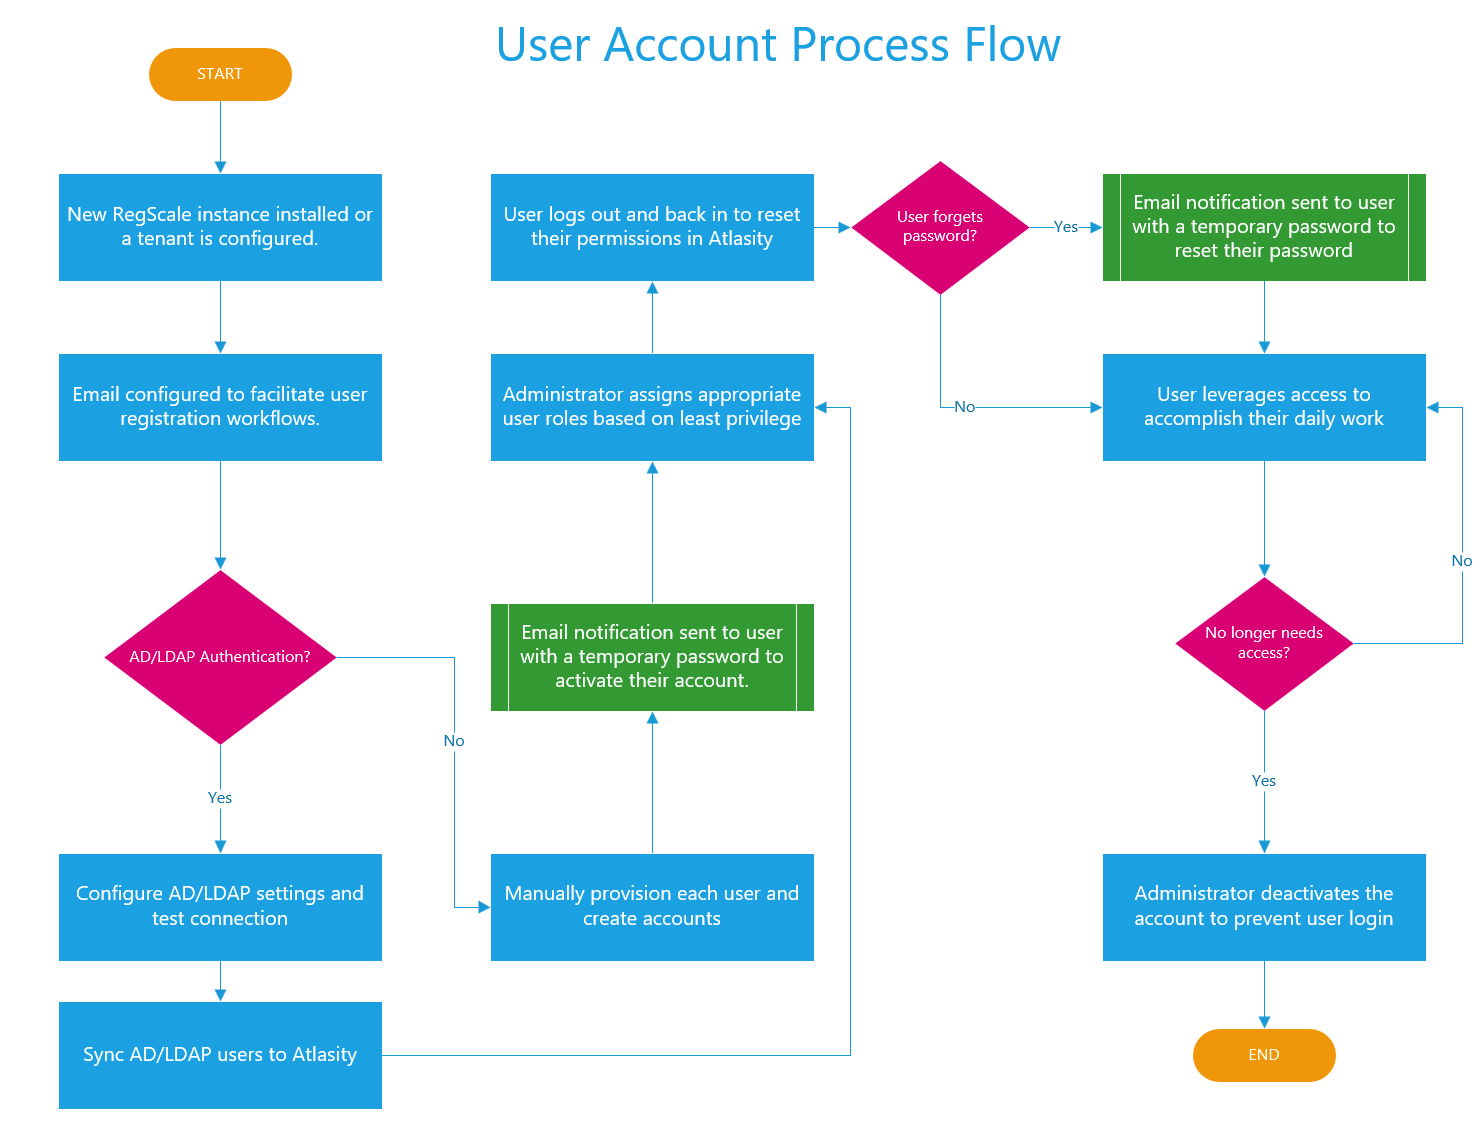
WARNING: While email setup is not required to provision users, it is highly desired. RegScale sends emails allowing users to register and reset passwords in a self-service model. If email is not configured for a tenant, the Administrator will need to manually perform these steps for each user.
New Users
Once a user is added in the Identity & Access Management tab, they will receive an email to confirm their account:
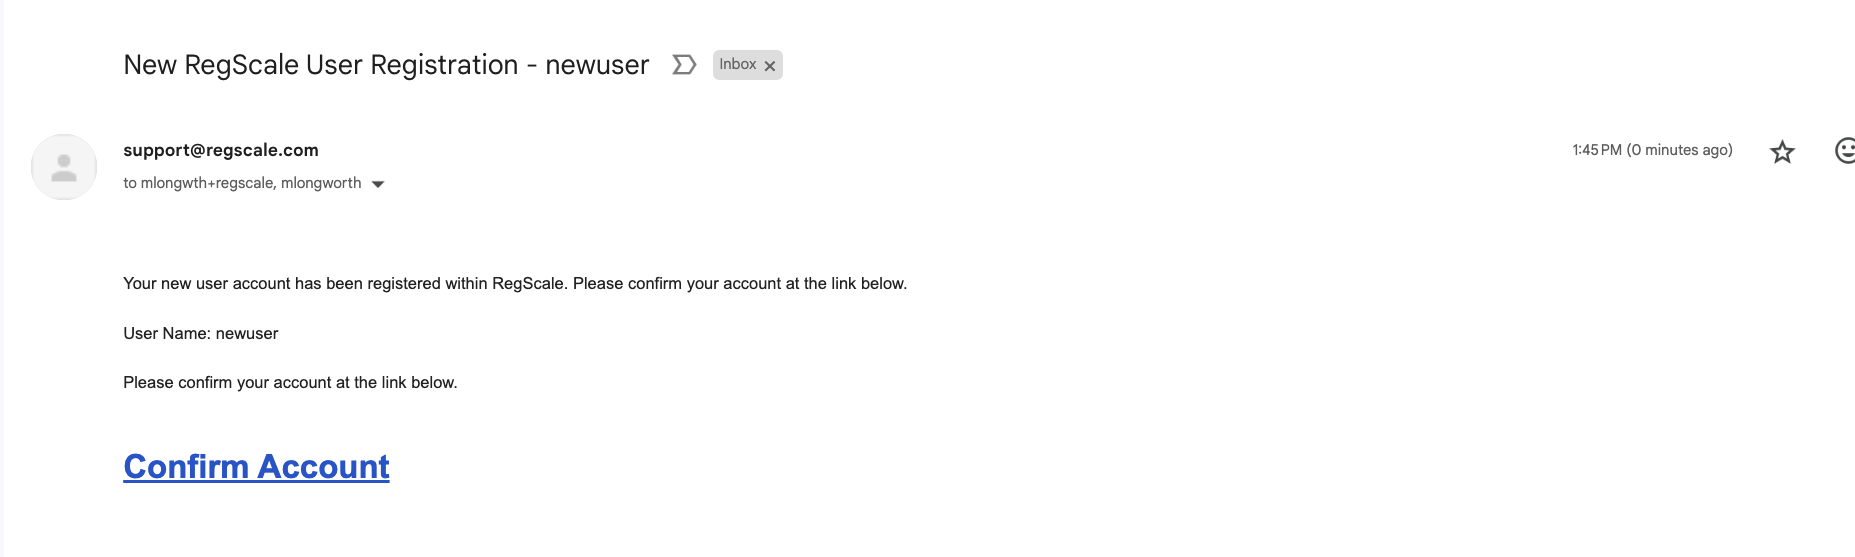
Users click the "Confirm Account" link and are brought to a dialog where they can set their password.
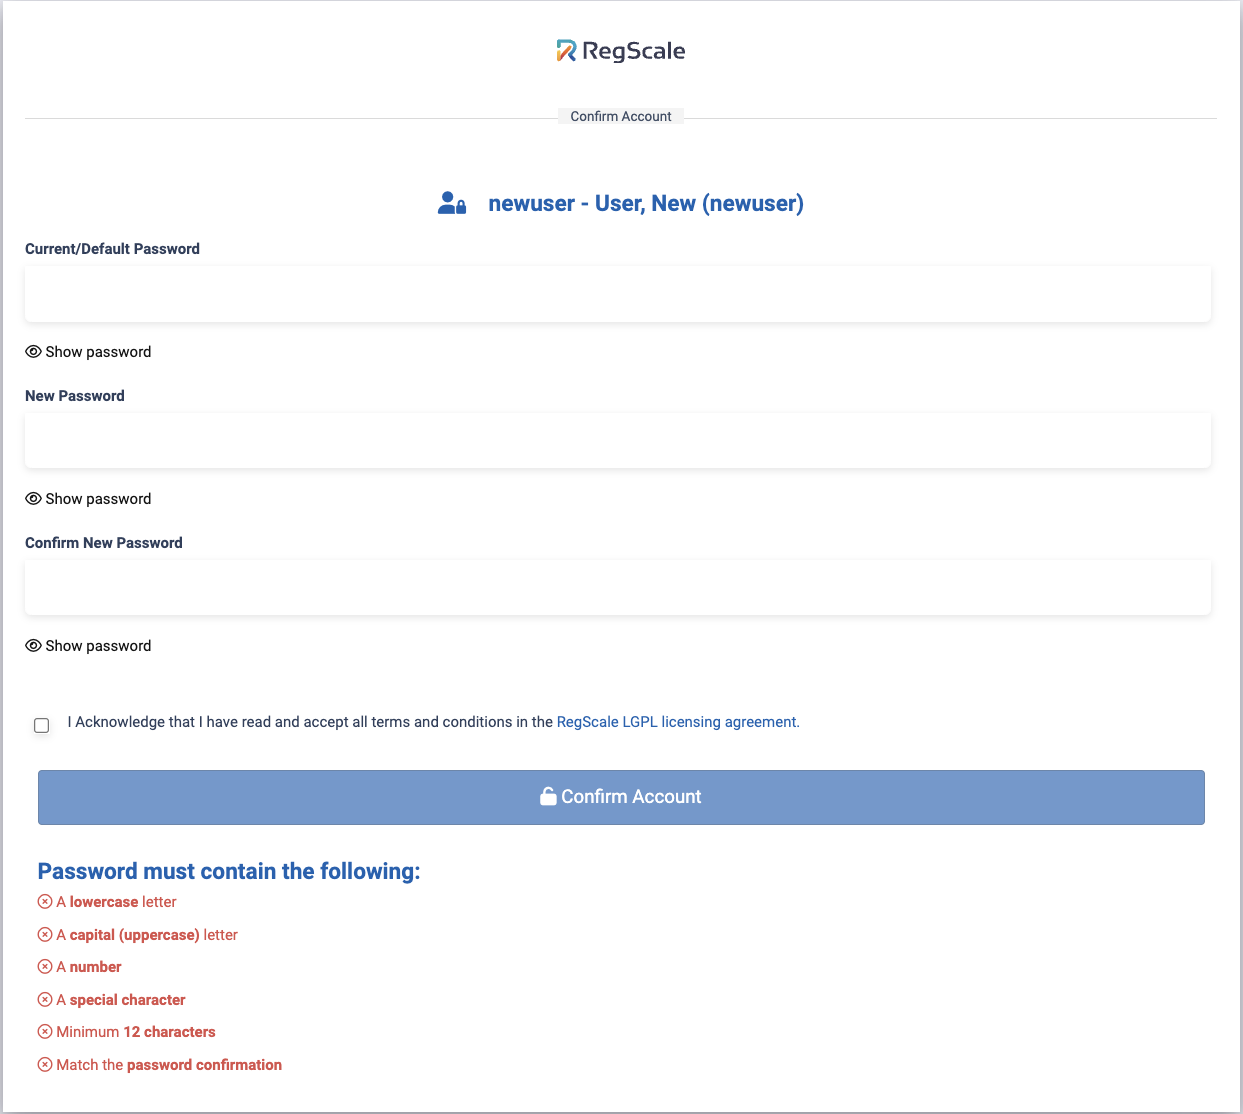
After they set their password, they can log into RegScale. If Multi-factor authentication is set, see below for steps.
Managing Groups
RegScale allows customers to logically group their users for ease of management. Each user can be assigned to zero or many groups within the system. To assign groups:
- Click "Setup"
- Click the "Identity & Access Management" tab on the left side of the screen
- Click the green "Manage" button underneath Groups
- The list of existing groups will be shown in the grid and can be searched/filtered
- Click the "Add New Group" button to create a new group
- Give the group a name and click the green "+" button
- The new group is now added to the list
- Click the "View Users" button to see who is in a given group
- Click the "Add User" button to add new users to the group
- Click the red "x" to de-activate a group (NOTE: Groups are not deleted to avoid data integrity issues) Groups are currently used to assign workflow steps within RegScale.
COMING SOON: In the future, groups will be used to apply access control to individual records and for email distributions.
Security Policies
For local accounts, security policies can be set by the Policy Configuration
Multi-Factor Authentication
When Multi-factor Authentication (MFA) is enabled, the site requires users to enter a TOTP from an Authentication Application like Google Authenticator (or any OATH/TOTP compliant authenticator application). The user will log on with their username and password and then be presented with a challenge to enter the validation code from their Authentication Application. Only with username, password, and validation code will the user be permitted to access the site.
Prior to setting up MFA, ensure that your email configuration is correct. The MFA setup will email all users with the link to set up their Authentication Application. If the users can't receive this email, they will be locked out (including the global administrator).
To setup MFA, Select the "Require Multi-Factor Authentication (MFA) for All Local User Accounts?" and enter an "MFA Prefix". This prefix is simply a way to make the issuer (RegScale) unique per customer. Best to use your organization name. The otpauth URI generated into a QR Code will contain this Prefix as follows:
otpauth://totp/RegScale%20-%20{PREFIX}:admin-admin?secret={USER SPECIFIC SEED}issuer=RegScale%20-%20{PREFIX}
Click "Save".
The next time a user attempts to log in, they will be presented an option for "Google Authenticator Token".
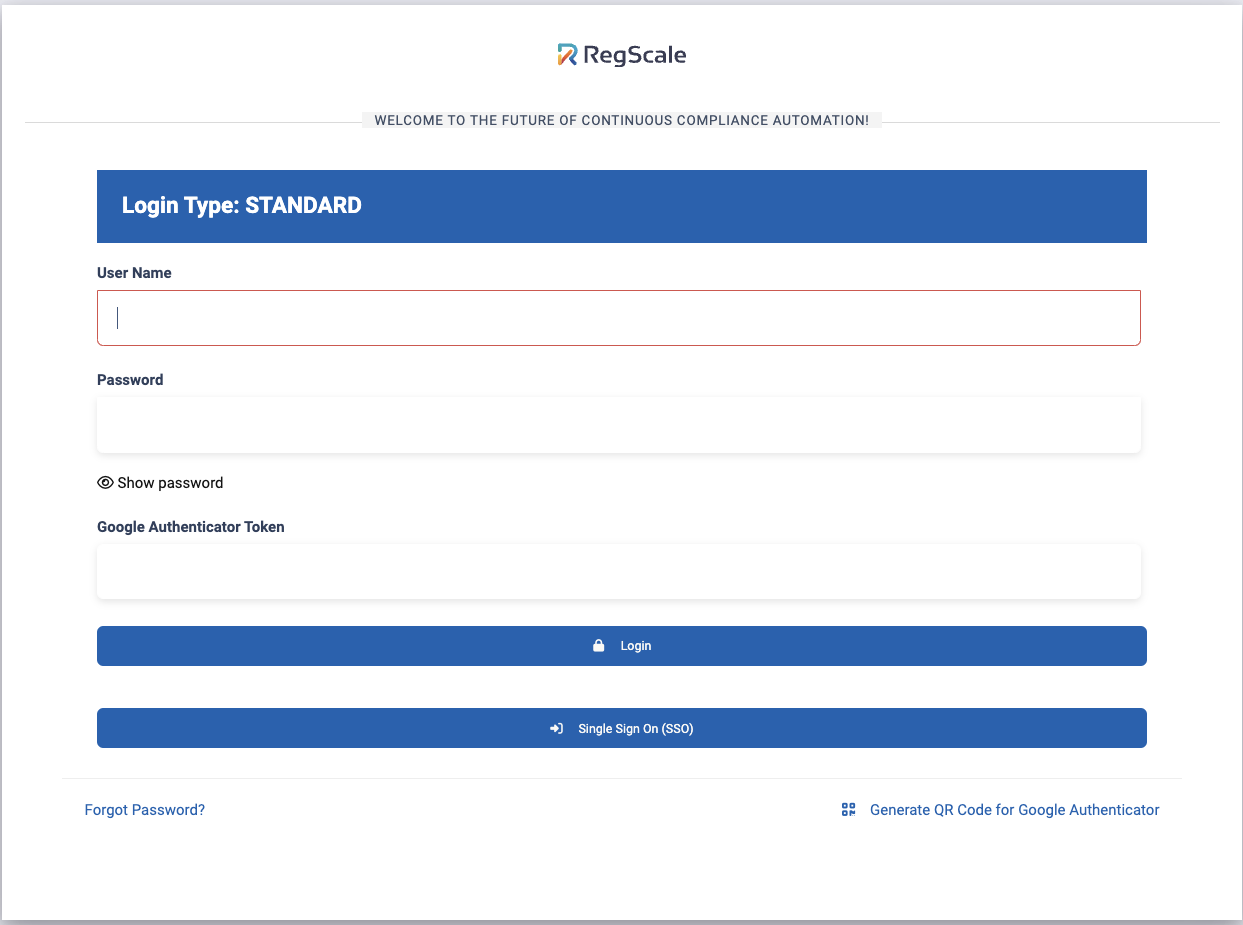
They should click the "Generate QR Code for Google Authenticator. This will send them an email containing the links to download Google Authenticator app for Android and iOS along with an Access Token, a 20 digit number.
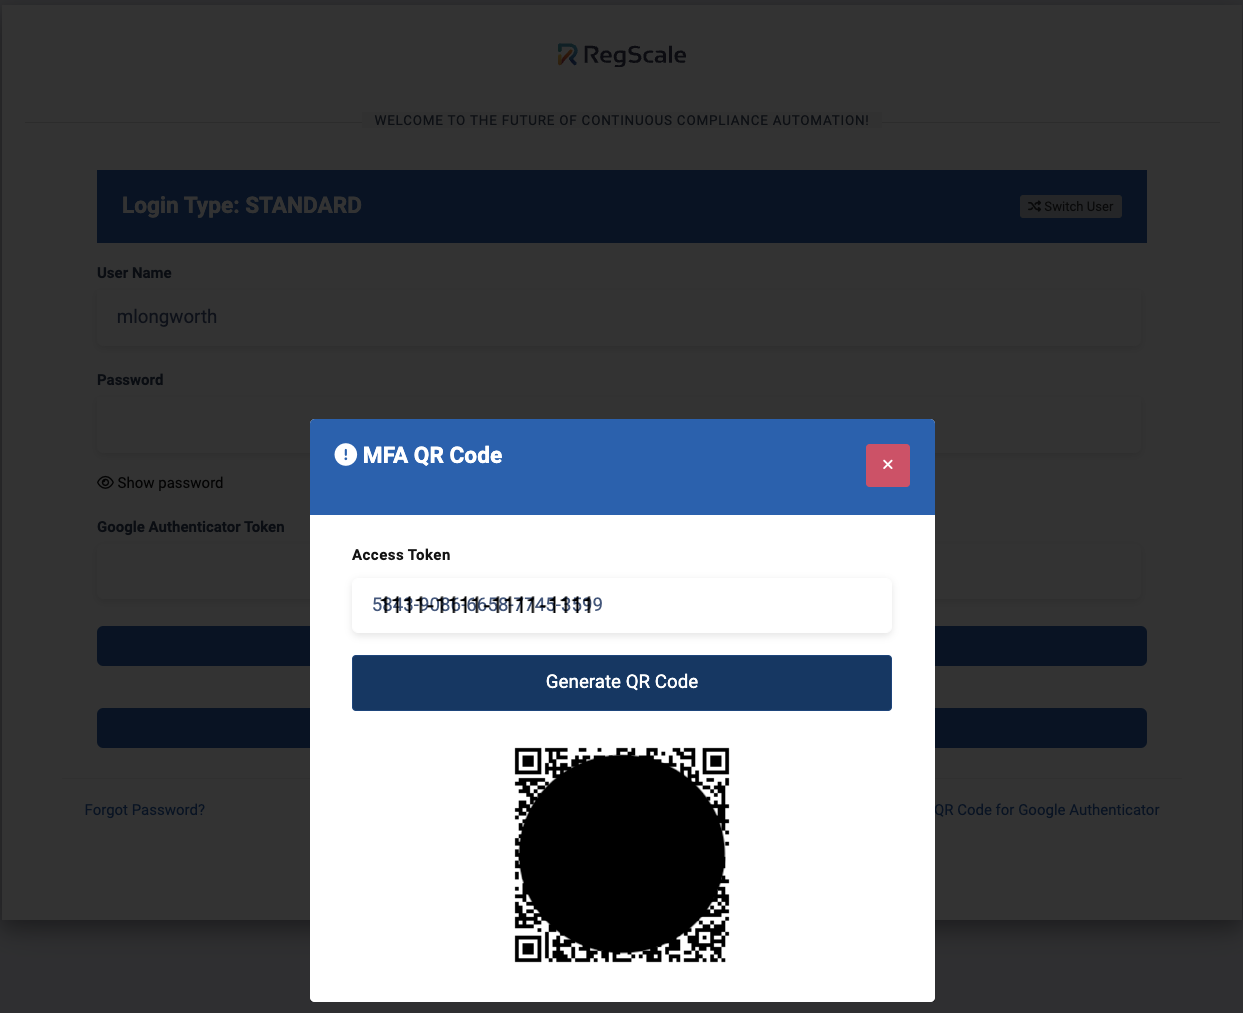
Return to the RegScale login and enter the Access Token in the dialog. It will display a QR Code to add the OTPauth record to your Google Authenticator.
After installing the authenticator application in a mobile device, use the app and "Add an account". User will be presented the option to "Scan a barcode". Scan the barcode on the screen. Afterwards, a six-digit code will appear. Enter that into the MFA challenge dialog shown in the image above. Each time the user logs in, they will need to enter the current six-digit code from the Authenticator app.
Updated about 1 year ago